Sunday, August 28, 2011

Cozy Homemade Bread = Serenity


     I spent Friday night and Saturday watching frightened New Yorkers stand in extremely long lines at super markets, hardware stores, even the video stores, desperately gathering last minute supplies before hurricane Irene hit the city.  At one point, the Trader Joe's on 6th Avenue in Manhattan had a line that stretched two city blocks.  I wandered into my local Met grocery for a few things to discover empty shelves and chaos.  


     Preparedness is important, but I couldn't help but smile about the final-hour fear.  I spent a nice rainy evening baking two hearty, sweet, nonperishable loaves of delicious whole wheat bread from scratch.  Ok, so they will eventually perish, but not in the four days to a week without power we were told was possible.


     I bake bread every few weeks, but not even for the final product.  I like bread and it comes in handy in a hurricane, but I bake it because I like the process.  It is far less laborious than bread machine manufacturers (and pretty much everyone else) would have you believe.  But it does require a certain level of patience.  You have to be willing to wait for it to rise...three times.  It takes several hours, but you are not working at it that whole time.  You mix, then relax for an hour, knead, then relax, etc.  And you have to (or get to) get your hands dirty, sinking them into the moist dough. My favorite part is the smell.  An odor of yeast and olive oil and warmth.  A smell that radiates outward from the oven until it fills my entire apartment and the hall outside.  


     This weekend, while listening to rains pelt the windows, the shuddering of winds assaulting the building and the trees outside, I lounged on my couch, watching hurricane updates and munching on a little slice of comfort. 


Homemade Whole Wheat Bread From Scratch
Ingredients

3cups lukewarm water (85 to 105 degrees)
Tbsp. dry yeast (2 packages)
1/2cup sweetening (honey, molasses, or brown sugar)
4cups whole-wheat flour (substitute 1 or more cups unbleached white flour if desired)
4tsp. salt
cup olive oil
3cups additional whole-wheat flour
1cup whole-wheat flour for kneading
Additions (whole oats, cranberries, raisins, walnuts, cinnamon, flax seed, pumpkin seeds, whatever you want)

Preparation

     In a large ceramic bowl, dissolve the yeast in the water. Stir in the sweetening. Stir in the 4 cups of whole-wheat flour to form a thick batter. Beat well with a spoon (100 strokes).


     Let the dough rise for 45 minutes.  It needs a warm - but not too warm - place to rise.  I turn my oven on very low and let the dough rise on the stovetop above.  I also cover it with a clean towel to protect and insulate the dough.


     Fold in the salt and the oil, then fold in the additional 3 cups of flour until the dough comes away from the sides of the bowl. Knead on a floured board for about 10 minutes, using the additional 1 cup flour as needed to keep the dough from sticking to the board. Stop when the dough is smooth.

     Let the dough rise for 40 to 50 minutes, or until doubled in size.


     Gently knead in additions until uniformly distributed.


     Shape the dough into loaves and place in 2 loaf pans or a single heavy baking dish. Let rise for 20 to 25 minutes.


     Preheat oven to 350 degrees.


     Bake for 40 minutes to an hour, or until golden-brown. I actually knock on the loaves, you can hear whether it is still doughy inside.  When finished it makes a solid noise, almost like knocking on a door.  Remove from the pans and let cool before slicing.  Enjoy!


     This recipe is based on the yeasted bread recipe from the Tassajara Bread Book.  Tassajara is a zen meditation community in Northern California.  (Check it out at http://www.sfzc.org/tassajara/)  It's a hippy culture, back-to-nature kind of thing, with a focus on sustainable living and healthy foods.  Their bread book is awesome!  Full of helpful tips and unique recipes.  It is a guide to bread from scratch complete with kneading diagrams and personalizing options within the recipes.  It is the bread baker's bible.

Friday, July 22, 2011

Curing the Summer Blahs

Photo thanks to http://takecareyourhealth.net
    OK, so of late, I’ve been feeling a little bit “blah,” quite uninspired really.  It’s not that I’m not cooking, eating, enjoying and even taking photos of my food (I always do this).  It’s that, for some reason, I’ve lost the will to share.  Maybe it’s the overwhelming heat causing general malaise.  Or the mass quantity of other talented food bloggers is daunting.  I’ve been procrastinating, not sharing new ideas.  I need to defunk myself as I’ve created some really great summer recipes I need to share!

    So, like ripping off a Band-Aid, I’m going to jump back in.  I apologize if I don’t start in any particular place.  I’m just sharing ideas for summer fun and ease with food.  Please feel free to comment with your own tips.  I will get to the recipe sharing again soon.
     To begin, a friend sent me a link to suggested recipes for alcoholic popsicles.  Great idea!  I can mix and match my favorite liqueurs, fruit juice and herbs/seasoning.  It’s 103 degrees in New York City today.  When I leave work and go home to my non-air-conditioned apartment, I can cool down with a delightful icy cold, cube cocktail.  The trick here is to use a liqueur, not a fully alcoholic beverage (just try to freeze vodka; it’s not ever going to work).  In general, liqueurs have 30% of the alcohol of liquor (like whisky, gin, rum, etc.).  Here’s the link: http://bites.today.com/_news/2011/07/12/7069189-bittmans-sweet-savory-and-boozy-homemade-ice-pops.  But I’m feeling inspired to create my own.  Maybe Grapefruit juice, basil and Grand Marnier?  Pureed watermelon and Limoncello with a dash of chili powder?  Plus, you can even make them in your ice tray, no popsicle stick, for an individual bite of refreshing flavor.
Photo courtesy of http://fat-loss-for-idiots.maxupdates.tv/nutritional-benefits-of-grapefruit/

  Other stay-cool ideas include:
   
    Homemade sushi.  Invest in sushi rollers and make your own!   I’m really into anything that doesn’t require me to turn on my oven.  Plus, when making sushi yourself you can come up with new flavor combinations and bump up the nutritional content with brown rice.  I’m thinking yellowfin, jalapeƱo, cream cheese or maybe salmon, basil, grilled watermelon.  Be sure to use a fresh, good cut of fish.  Here’s a good instructional video:  http://www.youtube.com/watch?v=swGJ2dIu9XE&feature=related


Photo courtesy of http://hauteapplepie.com

      Unique and satisfying salads.  In salad, I enjoy a combination of flavorful cooked food and crispy raw vegetables.  I recommend doing the cooking at night (when it’s cooler) and serving everything cold the next day.  Precook chicken, tofu, beets, fennel, kale or anything you are craving.  Different combinations of flavor and texture make summer salads much more exciting!
      Simple salad ideas:  Try blending cilantro, lime juice and zest, olive oil and a roasted ancho pepper and topping a filet of salmon with it.  Serve on greens along with avocado, green onions and black beans. 

     Or try chicken piccata salad.  Wrap chicken breasts topped with capers, olive oil, lots of lemon juice, garlic and black pepper in foil and roast in the oven.  Serve on greens with olives and sliced fresh garden tomatoes.
  Go forth and try new summer combinations.  Have fun and please share experiences in food and good ideas with the Evil Dictator of Taste.

Thursday, April 21, 2011

Spring = Fear of the Terrible Bikini!

     I’m not sure if it’s the change in weather for the warmer (and perhaps the terror sparked in me by even the word “bikini”) or my return to the gym after about a month of doing exclusively yoga and running, but lately I’ve been having some serious meat cravings. My dreams are haunted by burgers and yesterday I considered changing my Facebook status to merely “carnivore.”

     As I’ve mentioned before, I have serious problem with the meat and agriculture industries in this country. I usually try to avoid eating meat except on rare occasions when I can choose my own, know exactly where it came from and that, before my plate, the animal was happy and well nourished. I don’t want to eat meat from a cow standing in its own feces, pumped with hormones and steroids, or a chicken that has been plumped with cornstarch. Meat dyed to change the unappealing grey color it was, reshaped, ground and mixed with salts, or frozen. If I’m going to eat it, it better not be a health hazard. I also find comfort in the notion that whatever meat I’m enjoying be it cow, chicken or deer, it was happy and healthy before.


     If you feel grossed out by all the problems commercial meat can bring with it, then you understand why I usually abstain. My protein intake comes from nuts, seeds, beans, brown rice and whole grain starches, yogurt, milk and cheese, plus tofu a few times a week. Balancing the varieties of proteins to get all 9 essentials takes some work, but I do OK. Plus, if I need to, I can always balance my diet by adding meat (which is a complete protein). This is why I don’t call myself a vegetarian.


     Lately, however, I’ve been indulging in that fail-safe, adding meat pretty much constantly. I’ve been buying as much chicken, steak, burger and fish as I can get my hands on. The Union Market and Fresh Fish of Carroll Gardens are my dealers. They provide delicious animal and fish protein sources. The free-range, no-hormone chicken they sell at the Union Market is perfectly firm and flavorful. Irresistible!


     So long as I buy quality products, I feel free to give in to what I crave. I assume that my body will let me know what I need. If I’m craving meat, I probably need the nutrients in meat. There are some exceptions. Chocolate for instance I crave for a variety of reasons, not the least of which is simply mood enhancement. Trying to substitute exercise or some other mood enhancer for chocolate is a difficult proposition.


     Anyway, here is the first protein laden recipe from me this week, but probably not the last.


Fresh Fish and Vegetable Papillote
Difficulty:Ant Icon 32x32px
Makes: 3-4 servings
Time: 45 minutes, active time: 10 minutes


Ingredients:


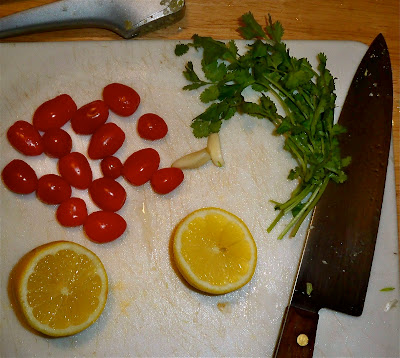
1 lb. fresh fish: salmon, halibut, tilapia, trout, sole but not steaky fish like ahi or swordfish or an oily fish like catfish. I used tilapia.
2 garlic cloves, minced
½ sweet yellow onion, chopped
1 cup fresh cilantro
1 cup grape tomatoes, halved
1 tablespoon olive oil
1 tablespoon lemon juice
4 lemon wheels, optional, add a little bit of flavor, but mostly just pretty
Salt and pepper to taste


Preparation:


     Preheat oven to 375 degrees. Place fish in large tin foil wrapper. Top with other ingredients. Seal foil. Bake 30 minutes. Serve over brown rice (if you use rice, it's best to start that before the fish as good brown rice takes about 30 minutes) or salad.
Juicy tilapia coming out of the oven
     This is the simplest version of this recipe. I often add Old Bay. Sometimes I want a little spice and I add some paprika and a dash of cayenne. Sometimes I use fresh basil, in place of or in addition to cilantro. I like the way sweet peppers poach in this dish as well. 
Roasting brussel sprouts and cauliflower
     This time, I roasted cauliflower and brussel sprouts in the oven, but not in the foil pouch.  These vegetables need to be crispy to be tasty, so I roasted them uncovered with olive oil, garlic, lemon juice and salt and pepper.  Flip once half way through baking.

     The papillote is sort of a catch-all. You can season and use whatever you want, throw it in the oven and forget about it for a while. When it comes out, it is tender and juicy, creating a nice broth to spoon over the rice.


     It is also very low in calories and fat, a really good way to eat protein without regret (think: bikini bikini bikini bikini).  And while I’m on the topic of healthy, weight-loss foods, I saw this article today: http://health.yahoo.net/experts/eatthis/6-best-worst-snacks. It is informative and right in line with my notions about nutrition. My additions: be careful about whole fat yogurt. 2% is good, but whole fat is just too much. Also, roasted and seasoned almonds and nuts not only come with increased salt and sugar content, but the roasting changes the oils they contain. It’s best to stick with raw almonds as a filling snack.

Monday, April 11, 2011

What's So Sinful About Pizza?

Homemade pizza!
     I am a pizza addict. And I’m fine with that. I can eat pizza every day for a week and not get tired of it. In high school, my friends and I used to have pizza eating contests, and often. The winner was crowned, of course, by eating the most pizza in one sitting. We didn’t set a time limit besides, “in one sitting.” Sometimes a contest could last for hours. Sometimes we all won, each finishing our own large pizza. There was literally one week during which we had pizza every night. And it wasn’t a torture. It was a joy. So when I say that I’m addicted to pizza, I’m serious. I even like it cold for breakfast.


     I also don’t find certain varieties of pizza to be as unhealthy as the general wisdom seems to. What is so bad about bread, cheese and tomato sauce? All are some of my favorite foods. And it’s not like they’re deep fried. I do tend to gravitate towards pies with lighter cheese, fresh vegetables and often a whole grain crust option. I prefer that my crust also be fresh, not frozen. Meat Lover’s from Pizza Hut may be really terrible for your health (and girth). The salt alone in food from most chain pizza places is enough to worry your doctor. But there are a plethora of other pizza options.


     So to satisfy my pizza craving, while working to do good, healthy things for me, I opted to make my own pizza instead of succumbing to the desire for greasy, salty pie. That way I limit the fattening ingredients and boost the nutritive content of one of my favorite junk foods. Pizza is perfect for this because the flavor doesn’t suffer when you make it healthier. It’s still cheese and bread and tomato sauce. And it’s still delicious.


     This recipe is one of my favorites. I make it about once a week. I used to buy crust, sold at most gourmet markets in the form of pizza dough. Roll it out and top it and you have pizza. But my dad gave me this really great homemade pizza crust recipe. I’ve been using it ever since. Making my own crust doesn’t significantly increase the amount of effort it takes to make pizza. I still make it as a weeknight staple, but it does take a little bit more time. The dough has to rise for about an hour before you can knead it, roll it out and create your pie. I just make it on a day when I get home a little bit early. Let the dough sit and rise, relax and decompress, and come back to finish making dinner.


     I usually use the time while the dough rises to make my own sauce, but this time I used premade Newman’s Own Basil Marinara instead. I highly recommend making your own sauce. There are all varieties of quick and easy tomato sauces. For one of mine please see the entry entitled, “Tuesday Night Vegetable Marinara.” Make just the sauce and top you pizza dough with it instead of Newman’s. It’s easy enough. I have no good excuse for not doing it myself. I was just feeling lazy.


Homemade Pizza
Difficulty:Ant Icon 32x32pxAnt Icon 32x32px
Time: 1 hour +
Makes: 8 servings/2 large pizzas


Ingredients:


1 cup warm tap water
1 package active dry yeast
3-3 ½ cups whole wheat flour
½ tablespoon salt
½ cup Olive oil, plus a little extra for drizzling on the finished product
2 Sausages (I used Italian herb tofu sausages), sliced
4 scallions, sliced
1 large head broccoli, sliced
3 cups mushrooms, sliced (I used shiitakes, but bellas or any mushroom is delicious)
2 large balls fresh mozzarella, thickly sliced
1 cup black olives, halved
2 cups Tomato sauce
2 tablespoons oregano
2 cloves garlic, minced
Balsamic vinegar


Preparation:


     Begin with pizza dough. In a large bowl, mix yeast gently into water with a fork until dissolved. Add 1 cup flour, salt and ½ cup olive oil. Stir using a wooden spoon. Add the rest of the flour, cup by cup, until dough begins to come away from the sides of the bowl and becomes a sticky mass.


     Sprinkle flour on clean dry, kneading surface and coat hands with it. Dump sticky mass of dough onto work-surface and knead for five to ten minutes, until your hand comes out clean after pressing the heel of it into the dough. Roll into a large ball.


     Place in oiled bowl and coat top with oil. Cover with a slightly damp towel.  Let rise in a warm place for 30-45 minutes, until it doubles in size. If you need a warm place, use your stovetop. Preheat oven to “warm,” and then turn it off. The residual heat should be plenty for the rising dough.


     Punch the dough down and knead for 1 minute.  You can let it rise again, coating it with another batch of oil, or proceed to pizza making. A second rising simply improves the texture of your crust.  Cut dough ball in half and roll out each to fit your pans.

I'm not a fan of using premade ingredients, but sometimes I make exceptions.
     While your dough rises, you can prepare your other ingredients. Begin by chopping and sautĆ©ing your sausages in a little bit of olive oil until browned. Set aside. SautĆ© your scallions in a little oil until lightly softened and caramelized. Set aside. SautĆ© your broccoli and mushrooms in a little olive oil, a little balsamic vinegar, salt and black pepper. Don’t overcook the vegetables. You want them to be a little bit less done than if you were simply going to eat them. They will continue to cook in oven so sautĆ© them until they’re al dente only. Slice the mozzarella and mince the garlic. Set aside.
Shallots sauteing
     Preheat oven to 350 degrees.

A wooden spoon is the perfect sauce applicator

     At this point, your kitchen counter should resemble an assembly line, beginning with the rolled out dough on the pans, then the sauce, followed by the cheese and other toppings. Spread the sauce out over the dough, top with cheese, toppings, then sprinkle the garlic and oregano over the top and finish with a drizzle of olive oil and balsamic vinegar.

My pizza pre-bake, just about to go into the oven
     Bake 30-45 minutes or until crust is crisp and slightly browned.  Slice and serve!
     There are so many variations on this recipe and they are all delicious. I sometime top with fresh basil after I take the pizzas out of the oven, or add a sprinkle of grated parmesan just before baking. You can experiment with different toppings and you’ll be surprised at how much it changes the flavor and feel of the whole meal. Mmmm!

Tuesday, March 22, 2011

Cheesy Vegetarian French Onion Soup

French onion soup is the perfect cheesy delight
     One of my favorite gooey, cheesy, guilty pleasures is French onion soup. I always think of it as being a restaurant staple, as they broil it. Dishes that come out sizzling seem somehow more difficult. But it’s actually not at all true. If you have a soup pot and a broiler, it is easy to make French onion soup.

     When I order it at restaurants, it is delicious but often too salty. I can only eat a few bites before I’m reaching for my water glass. But mmm are those few bites delicious! In an attempt to remedy this problem, I make a vegetarian version, substituting organic, low sodium mushroom broth for beef broth. Mushrooms lend the same underlying meatiness that beef flavor does, but without all the grease and salt. I also add one to two cups of water to the soup, letting it cook off into the broth.

     This version is as (or I think more) cheesy and satisfying as the original, but much healthier and vegetarian.  It is also remarkably easy to make and packs a nice wallop of impact for guests as it comes out of the broiler sizzling.

     This time I added actual mushrooms as well, but I’m giving you the recipe without them, as I think it tasted better without them. It’s certainly more traditional without mushrooms.

French Onion Soup
Difficulty:Ant Icon 32x32pxAnt Icon 32x32px
Time: 1 hour
Makes: 6 servings

Ingredients:

3 large sweet onions, sliced
4 shallots, sliced
4 cloves garlic, minced
3 tablespoons olive oil
1/2 cup dry sherry
6 cups organic low sodium mushroom broth
1 tablespoon thyme
Pepper to taste (there should be enough salt in the broth, but if not for your tastes, feel free to add it)
1-2 cups water
1 loaf French bread (baguette or other), sliced and toasted
2 cups grated Gruyere, Swiss, provolone or a mixture of all three
Slice the onions along in opposition to their layers, creating long thin slices
 Preparation:

    Heat oil in a large soup pot on medium. Add sliced onions and sautĆ©. You may need to adjust the heat higher or lower depending on your stove. You want the onions to soften and caramelize, not burn. When they begin to soften, add the shallots and sherry. SautĆ©, stirring occasionally for 2-3 minutes, enough time for the sherry to cook down and the onions to fully caramelize. Then add garlic. Cook one more minute, enough time for the garlic to become aromatic, then add mushroom broth, water (optional), thyme and pepper, and turn the heat up to high. When it begins to simmer, reduce heat, but keep the simmer going, stirring as needed for 15 minutes.
Soup coming to a simmer.  I used mushrooms this time, but it changed the consistency and I like it better without them.
    Spoon soup into bowl, filling about halfway. Add two slices of bread and top with more soup just to insure they become fully saturated. Top with generous portion of cheese.


The Gruyere is beginning to bubble up and change color in the broiler.
     Place under the broiler for 3-5 minutes. Keep a close eye on it. You want the cheese to completely dissolve, bubble up and turn brown. When this happens remove from broiler and serve. Use a plate underneath the bowl as it will be really hot to the touch.

     I love this recipe for this spring weather, rainy, but not too cool. French onion soup is cozy, like a watch-the-spring-rain-and-the-greening-of-the-world-from-my-window kind of dish. It’s light and little bit sweet, while being earthy and very satisfying. Perhaps it will warm me from the inside out, giving me strength to venture out into the rain. Maybe tulip shoots are also steeling themselves against the weather, preparing to expose themselves to damp, thawing air. Perhaps I should go find out.

Monday, March 21, 2011

Unintended Outcome: Yoga Week Creates Ripple Effect

Photo courtesy of www.ensowellness.com
Yoga week is officially over.  And it was hard.  Not so much the yoga as scheduling the yoga.  I didn’t make it.  I completed four days in a row, before waiting early on a Saturday morning on the subway platform for a train that never came.  I wasn’t the only one.  After 25 minutes to half an hour,  everyone left the station, forfeiting the $2.50 for a return above ground, each of us changing our plans, returning to bed, stopping into a cafĆ© for a now leisurely breakfast. 
I even saw another disgruntled girl with a yoga mat slung over her shoulder.  She paced nervously back and forth on the platform, back and forth, back and forth, before finally giving up like the rest of us.
My streak was broken, but I did manage five out of seven days.  That’s not bad.  And four days in a row is enough to change the way my body felt.  After the first class, I felt nothing, completely normal.  After the second class, I was so sore - my shoulders and thighs, even my abs - that I didn’t think I could complete another back to back class.  Even before the beginning of the third class, I sat on my mat wondering if I had the stamina to participate, telling myself that all I had to do was stick it out.  But after that class, I wasn’t sore.  In fact, I began to feel great.  I had more energy, felt leaner, longer, taller.  I felt better.  My whole body was functioning in unison, all muscles harmonizing and functioning at their highest level.  I felt thin and taught.  And this feeling continued into and after the fourth class.
I started to make better decisions about the food I was eating, opting for lighter, healthier meals and snacks.  White flour pasta?  That’s not good enough.  Whole wheat bagel with cream cheese?  No, I’m substituting all natural peanut butter.  Dessert?  No, I think an apple will be more satisfying.
Just going to yoga everyday made me want to do better elsewhere.  The humming, harmonizing feeling in my body made me want to contribute to that body and eat better.  I even slept better.
Was I longer and leaner, thinner?  Maybe, but I doubt it.  But who cares?  I felt better.  Yoga gave me something new.  I generally see yoga as a necessary component of lifting weights.  I don’t want my muscles to get tight, stalky, so I stretch them out.  Doing yoga everyday really felt like achieving some harmony between mind and body.  Usually treating it as merely a workout, I found myself actually using the quiet moments, meditating, really quieting my mind.  During the meditation part of the class, I generally make a list of things I need to do when class is over.  Or I take inventory of the class, was it a good workout?  How many calories do I think I burned?  What am I going to eat now that it’s over?  Calming my mind was an amazing relief.
My flexibility is greatly improved and that is staying with me.  The classes feel more natural due to this increase.  Even if I take a few days in between classes, I still maintain the extra bendiness I picked up during that week.
But it came with a consequence.  During the two days I didn’t go, I felt horrible.  I felt fat and lazy and tense.  I missed it.  When I lift weights at the gym, I feel stronger, and it lasts.  If I work out really hard and then take a day off, I can still feel the benefits of that workout.  I still feel sore, strong, my energy used.  Perhaps yoga doesn’t build as much muscle as weight training does, so I don’t continue to burn calories after I’ve finished the class.  Or perhaps yoga is just more addictive, and without my fix, I didn’t feel the same.
I’m now trying to keep it going.  I managed three days last week and a nice long run.  The class directly after the run felt amazing, even if my legs were exhausted.  This week I hope to do better.
My little pledge had a ripple effect and inspired a number of other such acts, prompting my mom to try to attend the gym every day that week as well.  My brother texted me after his first yoga class, ever, “Wow just finished at Yoga to the People.  Feel like day one of boot camp.”  Even my boyfriend, who’s fundamentally opposed to yoga offered to join me for a class.  Perhaps fitness is contagious.  Perhaps Zen is contagious too.

Friday, March 18, 2011

The Art of a Successful Dinner Party: Keep It Simple

The assembly line for delicious sirloin sandwiches
     I love entertaining. Or rather, I love the idea of entertaining. (By entertaining, I mean having friends and/or family over for dinner, not preforming circus tricks or my best Celine Dion impersonation.) I have a bad habit of getting exited, over planning my menu, overexerting myself, over scouring my house and just plain overdoing it. I get all these ideas and try too many things. I over complicate things. I choose dishes that I’ve never made before. Generally, I stress myself out and fail to put together anything really delicious or impressive.

     That being said, I think I’m getting better.

     Some tips on planning a menu:

     Keep it simple. Make dishes you know you can make, and not in your head, in practice. And nothing too time consuming. You want to be able to enjoy the company and occasion. You want your guests to be suitably impressed, but they’ll be more blown away that you can relax and hang out with them while serving a tasty spread, than they will be if you are clearly laboring on their behalf.

     Don’t make too many temperature specific items. It is hard to get everything together all at the same time, especially while talking and drinking wine. Serve some things that can be chilled or served at room temperature.


Antipasto complete with baby sweet peppers broiled in my oven
      Keep a plate of appetizers and wine ready when guests arrive. No guest likes to sit down and eat immediately after arriving, but usually some finger food will disappear, quickly. I like cheese plates or antipasto. Sometimes I have served more involved appetizers, such as egg rolls, but only when they can be made the day before. And many appetizers are just too filling. Either the meal or the appetizer ends up being mostly wasted. You want to opt for something light. Bread or crackers and cheese, or sliced vegetables and hummus work very well.

     Once again, keep it simple. This doesn’t refer to specific dishes, but to the whole menu. People don’t need or expect a five course smorgasbord when they come over. Just make a few yummy items.
In general, people are impressed if you make them something that tastes and looks good. You don’t have to pluck your own chicken or make water into wine.


What can I say?  I'm a sucker for decorations, especially fresh flowers
     Last week we had my boyfriend’s parents over for a late lunch/early dinner on a Sunday. Here is what we served:

Antipasto: sun dried tomatoes, kalamata olives, fresh mozzarella, roasted baby bell peppers and sliced focaccia bread
Salad: Sliced red tomatoes, fresh basil, olive oil, balsamic vinegar, salt, black pepper
Side: Sweet potato fries (although this is perhaps not an appropriate title as I baked them)
Sandwich: Marinated Sirloin with horse radish cream
Dessert: Panna cotta with balsamic strawberries courtesy of Ina Garten (although I used nonfat Greek yogurt, not whole fat) http://www.foodnetwork.com/recipes/ina-garten/panna-cotta-with-balsamic-strawberries-recipe/index.html
Beverage: Wine, an unfortunately mediocre California pinot noir

Difficulty (for entire menu): Ant Icon 32x32pxAnt Icon 32x32px
Makes (of each dish): 4-5 servings
Time: Seriously about an hour…for everything

     I made the panna cotta the night before they came over, but I saved the strawberries and lemon zest for just before I served dessert.


Sweet potatoes ready to go into the oven
 Sweet Potato Fries

Ingredients:

4 large sweet potatoes
3-4 tablespoons olive oil
Salt and pepper to taste
1 teaspoon paprika
2 sprigs fresh rosemary

     Start with these as they need time to bake. Preheat the oven to 350 and slice the potatoes thin and long, like traditional cut French fries. Then spread them out on a cookie sheet and drizzled the olive oil over the top, sprinkle the seasonings and simply place the intact rosemary over the top. Bake for 30-45 minutes, turning over/stirring about halfway through.


Tomato basil salad might be the easiest part of this meal, but make sure the tomatoes are ripe and in season
 Tomato Salad

Ingredients:

4 fresh ripe tomatoes, sliced into medallions
1 cup fresh basil, thinly sliced
1 tablespoon olive oil
1 tablespoon balsamic vinegar
Salt and pepper to taste

     Lay tomato slices out on a plate or platter, top with basil, olive oil, balsamic vinegar, salt and pepper. Serve at room temperature. It’s so easy and so good! Ah, tastes like summer…

Marinated Sirloin Sandwich with Horseradish Cream

Ingredients:

1 lb. sirloin steak
1 large red bell pepper
3 cups arugula
½ red onion, thinly sliced
3 tablespoons horseradish
1 teaspoon sour cream
1 ½ loaves fresh baked focaccia bread (use the other half a loaf for the antipasto)
1 tablespoon olive oil
1 tablespoon balsamic vinegar
1 clove garlic, minced
Salt and pepper to taste

     Marinate the steak in olive oil, balsamic, garlic, salt and pepper, set aside until ready to cook.

Delicious marinating sirloin
     Whisk horseradish, sour cream and a pinch of black pepper in a small dish, set aside. The amounts are flexible here, if it’s too spicy, you can add more sour cream, too mild, more horseradish. Other modifications include a little pinch of salt or paprika.

     Broil the red pepper. (I also bought a bag of small sweet peppers, yellow, red and orange from Santo’s Farm and broiled them at the same time. I served them as part of the antipasto.) You don’t oil or anything. Just place the peppers on a pan under the broiler. You will hear their skins begin to crackle and pop as they bubble and turn black. When you see and hear this, turn them over. When it happens again on the other side, they’re finished. Remove from broiler and allow to cool.

     When cooled, slice the large red bell pepper into long, thin, julienned pieces and set aside.

     Slice the focaccia into 3-4 inch sections, each cut in half as well, for sandwiches, and set aside.

     You may be wondering why so many items are being prepared and then “set aside.” The idea is that you’re setting up a sandwich assembly line. Eventually, you want to have bread, then horseradish cream, steak, peppers, onion and lastly, arugula laid out on your counter to make putting the sandwiches together easy.

     When you’re ready, when everything else - sweet potato fries, tomato salad, sandwich ingredients - is finished, cook your steak. I waited until my guests had arrived. We all sat at the table for a while enjoying the wine and antipasto. Then I cooked the steak. I wanted it to be a hot and cold steak sandwich, the meat to be a little bit warm.

     Heat a small amount of oil in a large frying pan at medium high. When the pan is really hot, drop the steak into it, allowing the extra marinade to drip over the meat. It should sizzle. Cook about 2-3 minutes on each side. You are searing it, it should crisp and blacken.

     After searing place steak on a sheet in the over (still at 350 from the sweet potatoes) for about 10-20 minutes depending on preference and thickness of your sirloin. Remove from heat and allow to rest for 5-10 minutes before slicing.

     Slice steak into ¼ inch thick long slices removing any fatty areas as you go. Leaving the fat on for cooking adds flavor, but for eating in a sandwich, it just makes the meat harder to bite through.

     Begin assembly by spreading horseradish cream on the inside of your sliced bread. Top with sliced steak, peppers, onion and arugula. Serve with sweet potato fries and tomato salad.


Ina Garten's panna cotta is a light and delicious way to end a casual meal like this, especially when made with nonfat yogurt
      I really enjoyed this meal. It was light and simple, but packed with flavor. And it gave me plenty of time for socializing and drinking wine, which was particularly pleasurable while the steak cooked, the smell of rich meat and caramelizing balsamic vinegar filling the kitchen and the accompanying sizzling sound. I hope you enjoy putting together your menu for a gathering as much as I did, be it based on this one or a completely new idea.